
This section explains how to install, license and remove the Easysoft ODBC-SQI SQL Engine on supported Windows platforms.
The installation can be carried out by anyone with local administrator privileges for the target machine.
There are three ways to obtain the Easysoft ODBC-SQI SQL Engine:
Select Download from the Easysoft ODBC-SQI SQL Engine section of the website and then choose the platform release that you require.
First time visitors must complete the new user form and click Register. Note that your personal Internet options may require you to login and click Continue if you have previously registered.
Change to the pub/sql_engine directory and then choose the platform release that you require.
The selection of components that you require to download in order to configure the Easysoft ODBC-SQI SQL Engine varies depending on the platforms on which you wish to run.
All installations must download the Easysoft ODBC-SQI SQL Engine software itself.
The name of the Easysoft ODBC-SQI SQL Engine install file is of the form:
where "x" is the major version number, "y" is the minor version number and "z" is the build index, which is incremented when minor changes are made.
"platform" will vary depending on the operating system distribution you require.
| Select the highest release available for your platform within your licensed major version number (installing software of a different major version number requires a new Easysoft license). |
If you intend to implement cross-platform data access, you also need to install either the Easysoft ODBC-ODBC Bridge (see http://www.easysoft.com/products/2002/main.phtml) for remote ODBC access or the Easysoft JDBC-ODBC Bridge (see http://www.easysoft.com/products/2003/main.phtml) for remote JDBC access from Java applications.
The Easysoft ODBC-ODBC Bridge consists of two separate client and server components and the Easysoft JDBC-ODBC Bridge consists of a single server component.
| You cannot 'mix and match' server and client components of the Easysoft ODBC-ODBC Bridge and Easysoft JDBC-ODBC Bridge. |
The following components are required for remote ODBC access to multiple databases on different platforms through a virtual data source:
The following components are required for remote JDBC access to multiple databases on different platforms through a virtual data source:
| If you are using Windows 9x with either the Easysoft ODBC-ODBC Bridge or the Easysoft JDBC-ODBC Bridge you will need Winsock2, which can be downloaded from http://www.microsoft.com/windows95/downloads/contents/wuadmintools/s_wunetworkingtools/w95sockets2/. |
Cross-platform data access software can be obtained as follows:
1. From the Easysoft Web site at http://www.easysoft.com:
For the Easysoft ODBC-ODBC Bridge:
This provides the Easysoft ODBC-ODBC Bridge Client.
This provides you with the Easysoft ODBC-ODBC Bridge Server.
For the Easysoft JDBC-ODBC Bridge:
This provides the Easysoft JDBC-ODBC Bridge.
2. From the Easysoft FTP site:
| Both client and server components are held in the same executable installation file for the Easysoft ODBC-ODBC Bridge. There is no specific client installation for the Easysoft JDBC-ODBC Bridge. |
You can now download a file and begin the installation process.
1. Execute the file distribution that you downloaded in Obtaining the Easysoft ODBC-SQI SQL Engine.
| Please shut down other Windows programs before installing. In particular, Microsoft Outlook can cause the installation routine to pause for several minutes when you start it. |
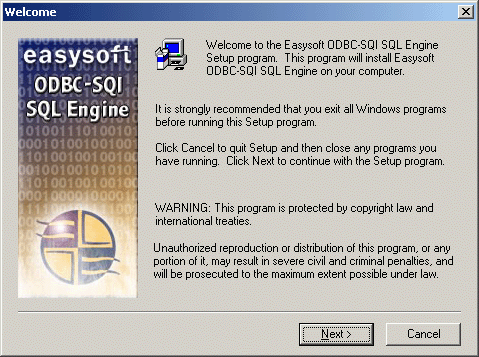
There will be a short delay while setup prepares the wizard to guide you through the rest of the install procedure before the Welcome dialog box is displayed:
The Software License Agreement dialog box then displays Easysoft End User licensing details:
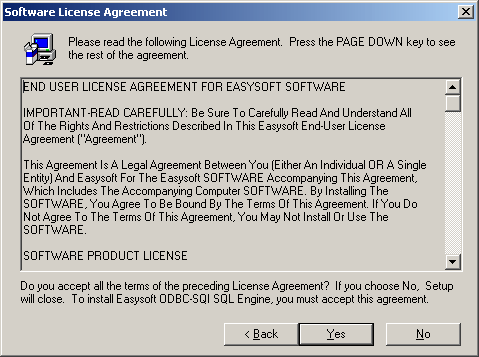
You are required to accept the terms of the License Agreement before continuing.
3. If you do not agree to the License Agreement, click No to exit the installation.
Click Yes to accept the License Agreement and continue with the installation.
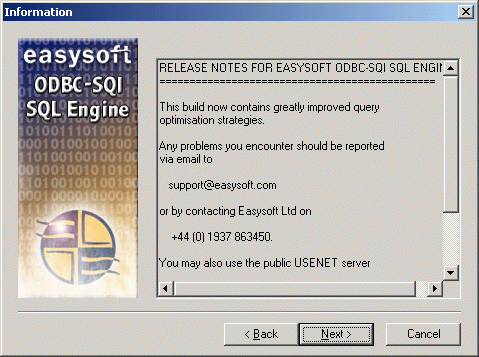
The Information dialog box is displayed:
The Choose Destination Location dialog box is displayed:
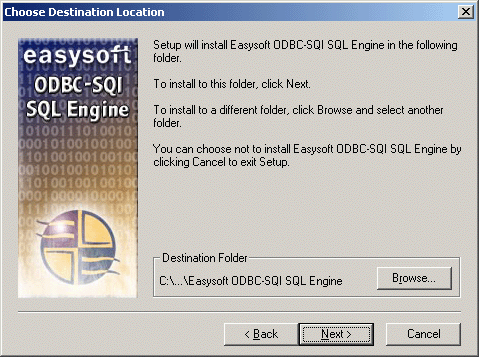
Choose the directory in which you want to install the Easysoft ODBC-SQI SQL Engine.
5. To accept the default, click Next.
To choose an alternative directory, click Browse to select the path you want, then click Next to continue.
There is now a short wait while the relevant Easysoft ODBC-SQI SQL Engine components are copied and configured.
The install program now starts the Easysoft License Manager (explained fully in the Licensing Guide).
The following types of license are available:
By licensing the Easysoft ODBC-SQI SQL Engine you are given three licenses: one for the Engine and two for SQI drivers which are components of the Engine.
Simple Query Interface (SQI) is an Easysoft term referring to the interface closest to the actual data being accessed. It allows the Easysoft ODBC-SQI SQL Engine to access that data.
For example, the Easysoft SQI-Tetra driver contains an SQI that enables the Easysoft ODBC-SQI SQL Engine to access data stored in Sage Tetra CS/3.
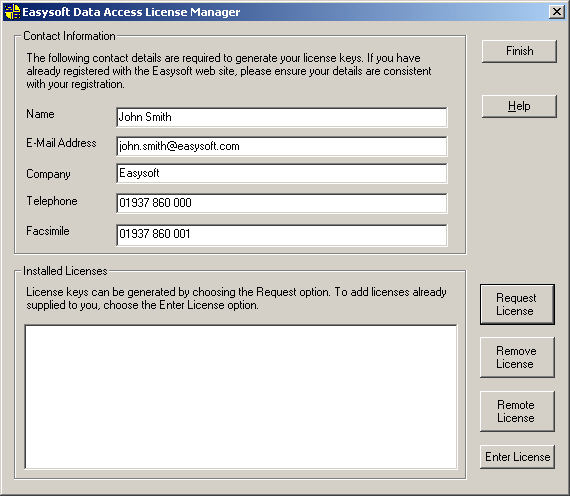
6. Enter your contact details.
You MUST enter the Name, E-Mail Address and Company fields.
The Telephone and Facsimile fields are important if you require Easysoft to contact you by those methods.
You are asked for a license type.
8. To trial the product, choose Time Limited Trial and then click Next.
The License Manager asks what software you are licensing. Select Easysoft SQL Engine from the drop-down list and then click Next.
If you have purchased the software and received your authorization code, select Non-expiring License and then click Next. The License Manager requests your authorization code. Enter the authorization code and then click Next.
9. The License Manager displays a summary of the information you have entered and lets you choose how to apply for the license.
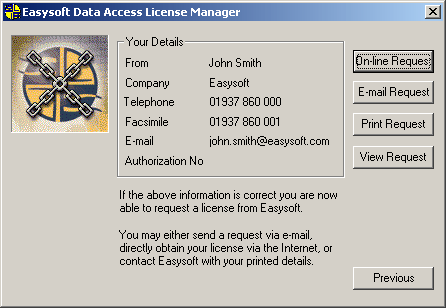
Choose On-line Request if your machine has a connection to the internet. The License Manager then transmits a network packet to the license server at Easysoft. The whole process is automatic and you can proceed to step 10.
| Only your license request identifier and contact details as they are displayed in the License Manager main screen are sent to Easysoft. |
The remaining three options (Email Request, Print Request and View Request) are all ways to obtain a license if your machine is offline (i.e. does not have a connection to the internet). Each of these methods involves providing Easysoft with information including your machine number (a number unique to your machine), then waiting to receive your license key. Instead of emailing, faxing or telehoning your details to Easysoft, you can enter them directly onto Easysoft's web site and your license key will be emailed to you automatically. To use this method, click View Request to display your machine number, then run a web browser and go to http://www.easysoft.com/sales/autolicense.phtml. Choose the type of license you require and enter your machine number and then click Continue. Your license key will now be emailed to you. When you receive the license key, you can activate it either by double-clicking the email attachment or by clicking Enter License on the License Manager main screen and pasting the license key into the dialog box. A message is displayed, telling you how many licenses have been added.
| If you use the Email Request option, the license key is emailed to the email address as displayed on the License Manager main screen, not the from: address of your email. |
10. Click Finish in the License Manager to return to the install program.
The Setup Complete dialog box is displayed:
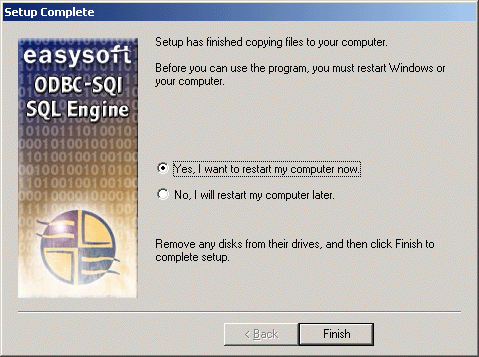
A folder called Programs > Easysoft > ODBC-SQI SQL Engine is created within the Windows Start menu containing links to:
You can check whether the installation has worked by linking to data in a sample virtual data source which is created during the installation. The sample data is installed into the \Demo subdirectory under the install path.
The following steps explain how to link to the sample virtual data source from Microsoft Access, but you could use any ODBC application on your machine (this example uses Microsoft Access 2000; you may need to adapt these instructions for other versions).
1. Run Microsoft Access.
2. Create a new blank database.
3. Display the Tables tab on the database window.
4. Right-click in the empty window, then select Link Tables. The Link dialog box is displayed.
5. From the Files of Type drop-down list box, select ODBC Databases (). The Select Data Source dialog box is displayed.
6. Click the Machine Data Source tab.
7. Select the SQL_Engine data source.
8. Click OK. The Link Tables dialog box is displayed.
9. Click Select All to link all the tables into the database, then click OK. After a few moments, the tables are listed in the Tables tab of the database window in Microsoft Access.
10. Double-click a table to view its data.
Connecting to your own virtual data sources is explained in "Configuration and Connection".
This section explains how to remove the Easysoft ODBC-SQI SQL Engine from your system although you do not normally need to uninstall this software before installing a more recent version.
1. Select Start > Settings > Control Panel, then double-click the Add/Remove Programs icon.
A list is displayed of applications that can be automatically removed.
2. Select Easysoft SQL Engine and then click Add/Remove.
3. Click Yes to confirm that you wish to remove the Easysoft ODBC-SQI SQL Engine and all its components.
The system begins to remove all the components. If shared components seem not to be required, you will be prompted to decide whether or not to delete them.
4. If you feel confident with the registry (i.e. your system has had relatively few programs installed and removed) you should click Yes or Yes to all to continue.
If you have any doubts (e.g. uninstall procedures have failed in the past) you should click No or No to All.
The uninstall process removes the Easysoft ODBC-SQI SQL Engine components from your system.
5. On completion, click OK to go back to the Control Panel Install/Uninstall window.
6. The uninstall process is complete.
Note that when you uninstall, your licenses are not removed so you do not need to relicense the product if you reinstall or upgrade.